How We Use Pinterest for Blogging
January 4, 2012
Can you believe it’s the middle of the week already? I thought I’d be a bit more organized by now but I’m still noticing a number of piles around our house…remnants of Christmas decor, gifts that haven’t found a home yet and far too much uneaten chocolate! I’ll be hiding the latter asap to make sure that I at least get a good start at my healthy goals for the year. I did make it to the gym yesterday and started documenting everything I ate into my Spark People account as well, which is like Weight Watchers only free! It’s really easy to use and you can track your fitness and weight loss goals there too.
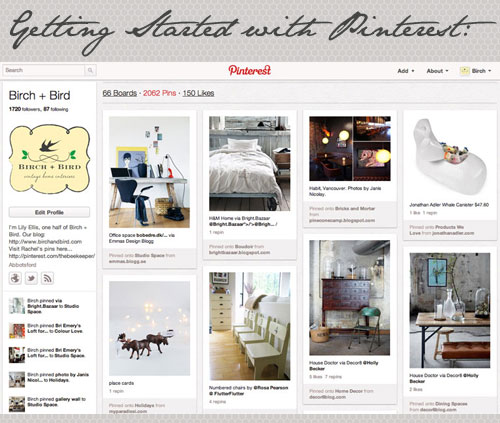
Speaking of organizing and keeping track of things, Rachel and I are often asked where we find all of the images that we share with you each week. In the past, we both read a number of blogs daily but as our focus turned to writing our own posts, amidst the daily bustle of family life, our leftover time to read other inspiring blogs soon became pinched. We also started to find it difficult to keep track of where we’d found images, their correct links and sources. A tool that has become invaluable to us in our blogging adventures is the wonderful world of Pinterest. Beware, Pinterest is highly addictive but it is also hands down the best way to catalogue images and where they originated in an easy to use, visual system. No need to shred your favourite design magazines anymore! Pinterest is the perfect solution to collect inspiration for blogging, weddings, renovations and oh-so-much-more. Here are some tips to help you get started as well as a few of my own recent Pins…
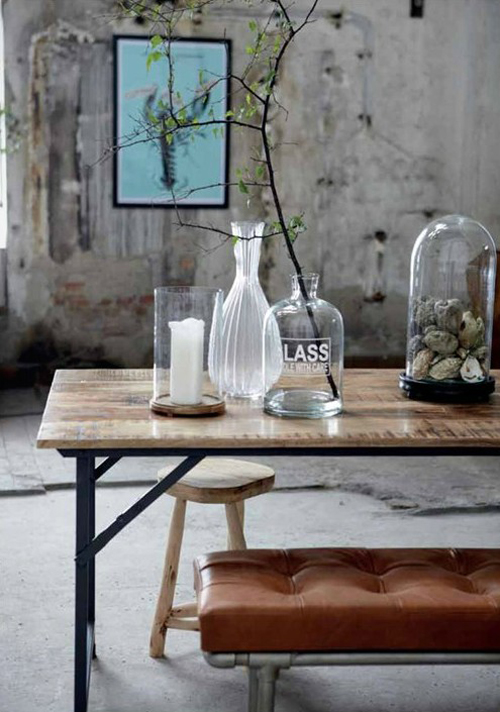 House Doctor via Decor8
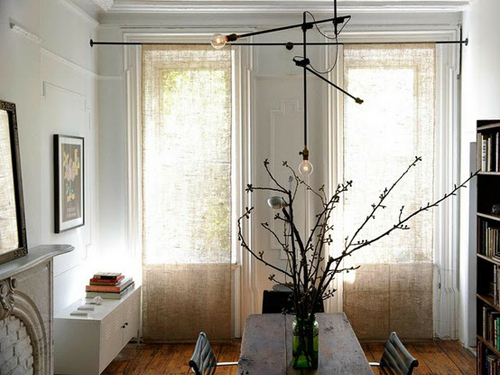 Blissful Blog via Fine Ting Og Sjokaolade. Photo by Workstead.
First, you’ll need to request an invitation or be invited by a friend…we’d be happy to invite you if you leave us your email address in a comment below. Once you’ve been “accepted”, you can also invite your own friends via Facebook and Twitter…the more the merrier, right?! Here are more specific details on how to get started with Pinning 101. You’ll need to install the “Pin It” Button to your bookmark bar (see the directions here) so that you can start pinning from your favourite blogs, websites and online shops.
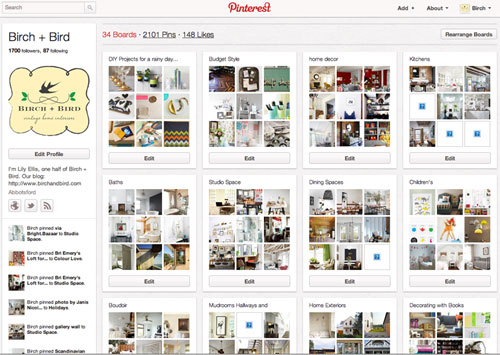
Within your own account, you can create Boards to sort your Pins into specific categories. If possible, try to be fairly specific with how you name your boards. Holly Becker of Decor8 has some very useful tips for categorizing boards and more over at Real Simple. There is no limit to the number of Pins per Board and, as far as I can tell, you’re allowed to create as many boards as you like.
Ok, so you’re all set up with your own Pinterest account…now what? I’ve had several people tell me that they’re clueless for where to start when it comes to browsing good blogs. My advice would be to start with the Blogroll of a blog that you do read (our blogroll is on the right hand side of our page) and odds are good that you’ll find at least a few more good reads. As you start discovering images that you simply must save, here are the steps to Pin them into your new account:
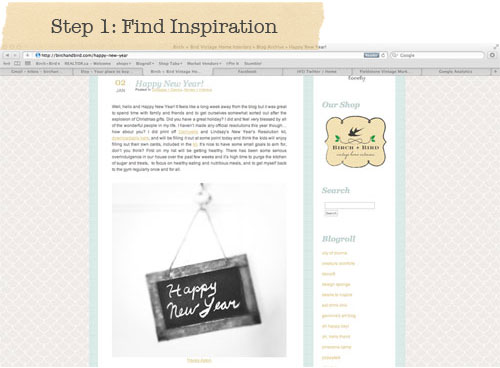
1: Find Inspiration. There it is…the kitchen, the wedding dress, the teapot of your dreams! Before you click on your shiny new “Pin It” button to save it onto your tidy new Board, make sure that you’ve clicked on the title of the blog post, and aren’t Pinning it from the main page of the blog. This will will ensure that, in the future, whoever clicks on your Pin will be brought directly back to the original blog post where you found it and won’t have to scroll through days, weeks, months (you get the idea) of other posts to find the image and credits. At this point, it also helps to double check that the blog you’re on has correctly credited the image in the first place. (Scroll further for more about crediting etiquette…)
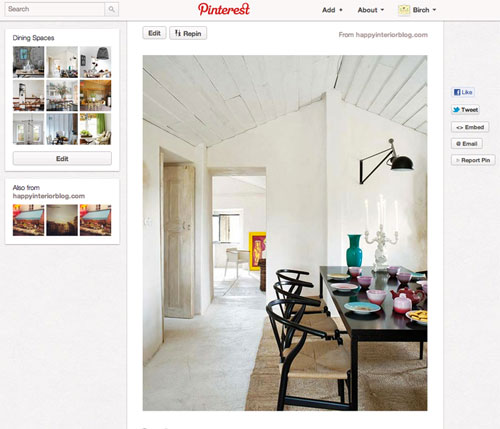
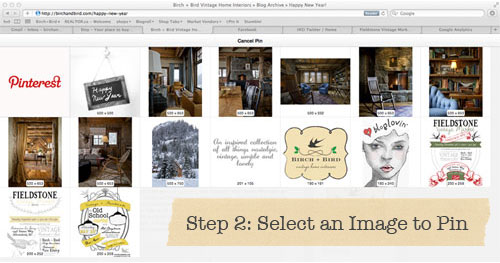
2: Select an Image to Pin. Once you’ve made sure that you’re Pinning from the actual blog post, click your handy dandy “Pin It” button (forget where it is? It should be at the top of your page, in your bookmark bar, right under your browser window. For technical difficulties, refer here) and a selection of images from the screen will be brought up for you to choose from. Click on the image of your choice…
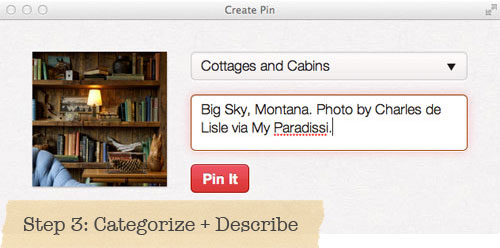
3: Categorize + Describe Your Pin. Once you’ve selected your image, you’ll be asked to categorize and describe it before your Pin is officially created. Choose from one of the Boards that you’ve already categorized or create a new board. Leave a fairly detailed description of the image and, if you plan on sharing the images on your own blog, make a note of the photographer or additional credits. Click the red Pin It Button and, voila, you’ve created a Pin!
Something that we strongly encourage you to always do on your blog (whether using Pinterest or not) is to credit images correctly. Here are some more tips for correctly sourcing and crediting images with Pinterest:
- Do not Pin from unreliable sources like, Tumblr, WeHeartIt or blogs that haven’t properly credited the image in the first place. Use Google Image Search (save the image to your desktop and then upload it with the camera icon) to find the original source and Pin the image from there.
- When sharing an image found on Pinterest on your own blog, never credit “via Pinterest”. The Pinner should not get credit for the image. Always give credit to who the image actually belongs to. In addition, if you found the image via another blog, the correct credit should say “Original Source” via “Another Blog”. (On a side note, another pet peeve of mine is when image credits are only numbered (example 1/2/3/4) and don’t say the blog’s name?it only takes a few more seconds to type the source’s name and is a simple common courtesy to fellow bloggers and photographers.) For more fabulous information on crediting blog photos, be sure to read this great post by Chelsea Fuss of Frolic.
- If you notice a Pin isn’t correctly sourced and you know where it came from, leave the correct source link in a comment on the Pin.
Once you start to “Follow” other people on Pinterest, you can Repin their images as well. The more people you follow, the more inspiration for you to sift through. Rachel and I both try to Pin more images directly from blogs than we do Repin, to keep the selection fresh. If everyone continuously Repins each other, it gets a little tedious scrolling through repetitive images. On that note, try to avoid blatant self-promotion. Pinterest is a great way to generate traffic to your blog but it can also get a little bit dull when certain magazines and bloggers only Pin images from their own sites. Make a Board specifically for your own tutorials and images and try to phase them in amongst your other Pins rather than Pinning them all at once. You can find more information about Pinning etiquette, here.
Phewf, that was a lot of information, wasn’t it?! Hopefully I didn’t scare you off but only helped make your web journeys more enjoyable and less overwhelming from this point forward. If I wasn’t clear enough on any of the technical aspects, just pop by Pinterest for more details. And feel free to browse at whim through both Rachel and my own Pinterest boards…there are now links on our blog to them both. Happy Pinning!


